Thursday, August 20, 2015

Line following sensor

Line tracking robot sensor.

Normally we get Black path on White background or White path on Background. As we know Black colour absorb the infrared and white colour reflect the infrared. So we can use this characteristic of infrared to indentify whether the sensor is placed in path or not.


Sensor Number :- TCRT 5000
Note :- there are many sensors which do the same task as TCRT5000
In here I describe about sensor called TCRT 5000 But for Line tracking purpose the best Sensor is 
395F 048W
In Sri lanka you can find it in UNITEC and SENITH electronics.
395F 048F

This sensor can use for following circuits.
In above sensor there is two components. One is IR LED and other one is IR sensitive photo transistor.

What is Photo transistor:- It act like a normal transistor. But only different is this transistor can on/off by point a IR beam to it.


Sensor is worked like below picture.
1) When power up the IR LED it continuously emit the IR beam. (you can see it through a Camera).
2) If it hits in a White surface it will reflect lot of IR beam to Photo Transistor. So current is passed through the Collector and Emitter.
If it hits in a Black surface it will absorb lot of IR and reflect few IR beam. So it is not sufficient to open the gate between Collector and Emitter.(So current cannot through the Collector and Emitter or very low current will flow through the Collector and Emitter).

But we are not  connect this sensor directly to the arduino. It will connect through the following circuit.

You can connect two sensor to one IC(LM 358).

Use J1 and J2 to connect wit arduino. In J1 and J2 there is two terminals to each. One cumming from the circuit's ground(Say pin_G ) and other direct from the IC (say pin_IC). When connecting to the arduino you need to connect one of pin_G to arduino's ground pin. other to any analog read pin.

Also you can adjust the sensitivity by adjusting the preset. (RV1 and RV2).

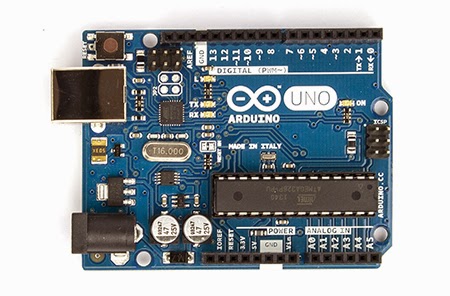
Also you can use ready made arduino line hunting sensors.


And there is ready made line sensor array.

Saturday, March 7, 2015

Find component values (Resistor,Capacitor)

Resistor

Most resistors specify their values by series of colour codes.

Each colour has a number.

Nowadays we can see resistors with 4 colour codes , 5 colour code.


How to read a value of the resistor.

When you look at the colour codes there is one colour code which is far away from the other lines.


Then hold the resistor like in the above picture.
Then you have to Read the values.

Table of colour codes.


If it's total line count = 4

          First 2 lines replace with the relavant number for that colour.
          3rd line is will give the multiplier.
          4th line give the tolarance precentage.

Example
In this resistor 

First colour is brown So first digit is                 1
Second colour is black So second digit is          0
Third colour is greenSo multiplier is                 100000              simply 5th power of 10
Fourth colour is gold So tolerance is                 5%

Then resistor value is    10*100000 = 1000,000 ohms   (1 Mohms)
Note:- Value come with unit ohms
Exactly this is not the actual value of the resistor. It relies in +/- 5% margin above value.
1000000*5%=50000ohms
So the actual value is relies on 1000000-50000 and 1000000+50000 ohms range.
950000 and 1050000 ohms  (950Kohms to 1050 Kohms)

If it's total colour count =5 


First 3 lines replace with the relavant number for that colour.
          4th line is will give the multiplier.
          5th line give the tolarance precentage.

Example

In this resistor 
First colour is orange So first digit is                   3
Second colour is orange So second digit is          3
Third colour is white So second digit is               9
Fourth colour is black So multiplier is                1             simply 0th power of 10
Fifth colour is brown So tolerance is                 1%

Then resistor value is    339*1 = 339 ohms  
Note:- Value come with unit ohms
Exactly this is not the actual value of the resistor. It relies in +/- 1% margin above value.
339*5%=3.39ohms
So the actual value is relies on 339-3.39 and 339+3.39 ohms range.
335.61 and 342.39 ohms.

Can we find Any value we need as the single resistor.
NO..
there is few series of resistors.
Example 
E12  consist of multipliers (10th powers multipliers) of theses values
10Ω, 12Ω, 15Ω, 18Ω, 22Ω, 27Ω, 33Ω, 39Ω, 47Ω, 56Ω, 68Ω, 82Ω

 That mean we can find 1ohm (10*10^-1)  10 ohm (10*10^0)  100ohm (10*10^1)......  resitors. 
As well as 1.2 ohm 12 ohm 120 ohm 1200ohm ......

If we need 13ohm we need to get it by combinations 12+1 ohm.

There is many more resistor series.


Read valeu of a capacitor.
Some of the resistor's value is represnted directly.
Some of the resistor's value is represnted as a code.

In here 104
That means 10  (take the first digit as it is)   *10^4  (4th power of 10)
10*10^4=10*10000
100000pf
Note :- value come from pF.
100000pF=100nF=0.1uF


Wednesday, February 11, 2015

NodeBot error resolving

This post is for error resolving steps which described in this POST.

Step 2 Errors

npm is not recognized

  • Right Click on the windows button.
  • Select System
  • Click advanced system settings in the left side
  • Go to Advanced tab
  • Click the environment Variables button
  • In here you will get a window with two sections. (User variables for and System variables)
  • In system variables you can see 2 column table.
  • find the row which has PATH in  varibale column.
  • Select it and press Edit button.
  • In here you will get a small window.
  • Add the following line in the end of the current data for the 2nd TEXTBOX. ;C:\Program Files\nodejs\
  • This is the same directory where your nodejs is installed.
  • Press Ok. on every windows.


Error: ENOENT, stat 'C:\Users\User1\AppData\Roaming\npm


  • Create folder called npm in the given path(Path which comes with the error)
  • Note:- Some times Appdata folder maybe hidden.
  • You have to click the Show hidden folders radio button in folder option window in windows.


Step 4 Errors

When you install maybe you will ask for the permission to write in folder.


  • Click continue.


Step 5 Errors

program exit with errors of TIMEOUT.


  • This is because the first port in the list does not belongs to the arduino.
  • So you have to go to the device manager and under port section you have to uninstall some ports.
  • You need only uninstall the ports those are list before the arduino's com port.
  • Example in command line port list shown in error is COM2 COM5 COM3 COM7
  • And com 3 is for the arduino board.
  • Then simply right click in COM2 line in the device manager window and click uninstall.
  • Do the same for thr COM 5 


Note:- you no need to do it for the COM7

NODEBOT Control arduino board from computer

This post show how to control arduino from computer (Include installation process)

And also this is the first step for beginners to learn arduinobots.

First You need to install following softwares.

  STEP 1


  •  Node.js
  • Microsoft visual studio
  • Python 2.7


               x86 are preferred.


STEP 2


  • after installation above 3 applications you need to install jhonny-five library.
  • To do that get the command prompt and type following command


                         npm install johnny-five

 Note:- To do that you need connect computer to the internet


  • after you enter the command it will get some packages from the internet and installed in your current directory
  • When you go to your current directory in windows explorer you can see folder called node_modules   in that folder you can see johnny-five  folder.


To resolve errors please refer STEP 2 errors in this page


STEP 3


  • So get the wordpad and enter the following code in it.


THIS CODE IS GET FROM THE JOHNNY-FIVE GIT REPOSITORY.

var five = require("johnny-five"), // or "./lib/johnny-five" when running from the source board = new five.Board(); board.on("ready", function() { // Create an Led on pin 13 and strobe it on/off // Optionally set the speed; defaults to 100ms (new five.Led(13)).strobe(); });


STEP 4


  • Then save it in C:\Users\User1\node_modules\johnny-five as test.js

Note:- User1 is your username.


  • If a message popup press ok button or yes button.


To resolve errors please refer STEP 4 errors in this page


STEP 5


  • Then goto commnad line and go to the above folder (which file saved) by using this command


cd C:\Users\NRV\node_modules\johnny-five


  • then Connect arduino borad and type


node test.js


To resolve errors please refer STEP 5 errors in this page


Now you will see the arduino boards pin 13 led bulb blink.

Wednesday, February 4, 2015

Get start with raspberry pi

What is raspberry pi?

                Raspberry pi is an small computer with some interfaces give connection to the external electronic circuit.

Why?

  •   Because you don’t need to learn special softwares to work with this machine.
  •   You can easily use python Java.
  •   Linux based.
  •   Usb connection and video output given
  •   Cheaper than any other computer
Models
                Currently there were 3 models released

  •   Model A
  •   Model B
  •   Model B+


My most of demonstrations will be doing using Model B

Thursday, November 13, 2014

Customized arduino

Create customized arduino for your project


  • In arduino uno there is special feature.
  • It is you can make your own arduino uno board for seperate projects.
  • I mean you don't need to buy seperate arduino board to seperate projects.

So how?
buy an atmeg 328p chip. (This is the main controlling chip of he arduino uno board.)
also buy 
             2 *22pf capacitors        
             1*16Mhz crystal          
             1*10K resistor             
             1* Push to on switch    
             1*28Pin IC base           


In black - Name of the pin of the IC
In red - Mapping name of the arduino board.

If you want to get digital out 13 's data then you have to get it via the 19 pin.


What is Arduino?


What is Arduino?

Arduino is an circuit which has ability to run custom Programs.

Now we can find many circuits from arduino family.
       Ex:-Arduino Mega,Arduino Uno, Arduino Nano etc.

Why it is popular?
        Because there are many modules which help to arduino.  Ex:- Arduino line following                        sensor,Ultrasonic sensor.. etc.
    So user can develop complex circuit even from small electronic knowledge..

      Note:- But Best programming skill gives best results.


In my Tutorial I will Use arduino uno Rev3 circuit.


  1. First of all You have to download arduino IDE.

                Link:- Download IDE
                  Note:- I use 1.5.8 Version IDE.

   Steps are follows
         
Click I Agree Button

Click Next Button
Click Install Button

After it install begins

Note:- If system ask for install driver then press install.

After Complete it looks like this.


Installation verification steps.
Connect your arduino uno.
Open Arduino IDE.